Climbing rope rugs are popular pieces of decor for climbers and non-climbers alike. The only supplies you need to craft this outdoor-inspired decoration is a climbing rope and a lighter. In this tutorial, we used a two-tone climbing rope. Half of the rope is solid green and half is a patterned green. Ropes like this are often used by climbers so they can keep track of how much rope they have to work with while climbing.
Step 1:
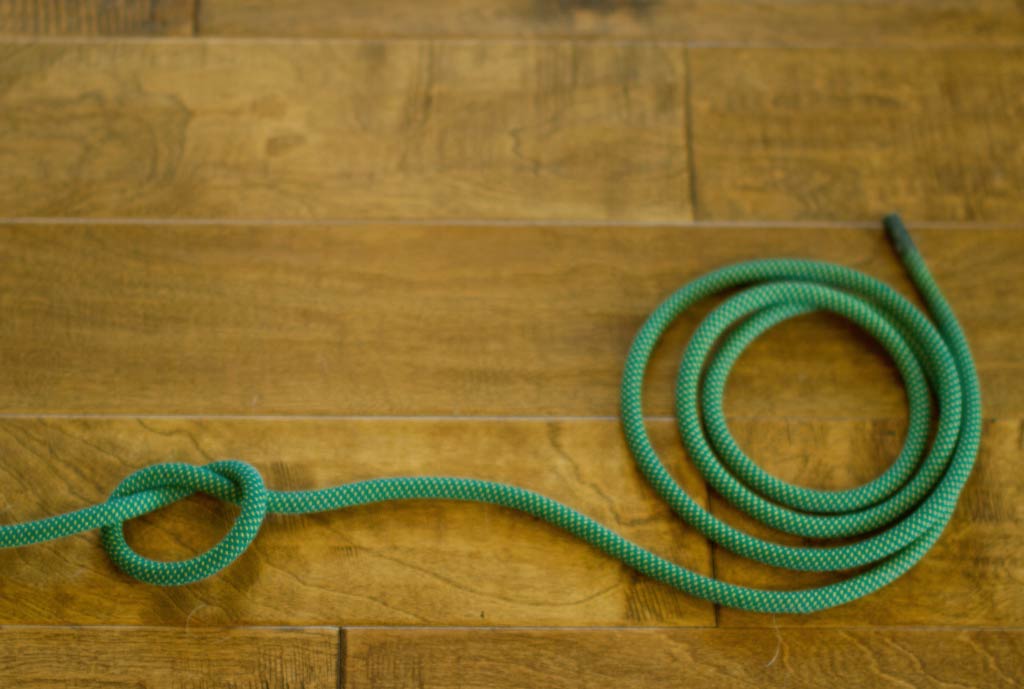
Make a simple overhand knot; the same knot you'd make to start tying your shoes.
Step 2:
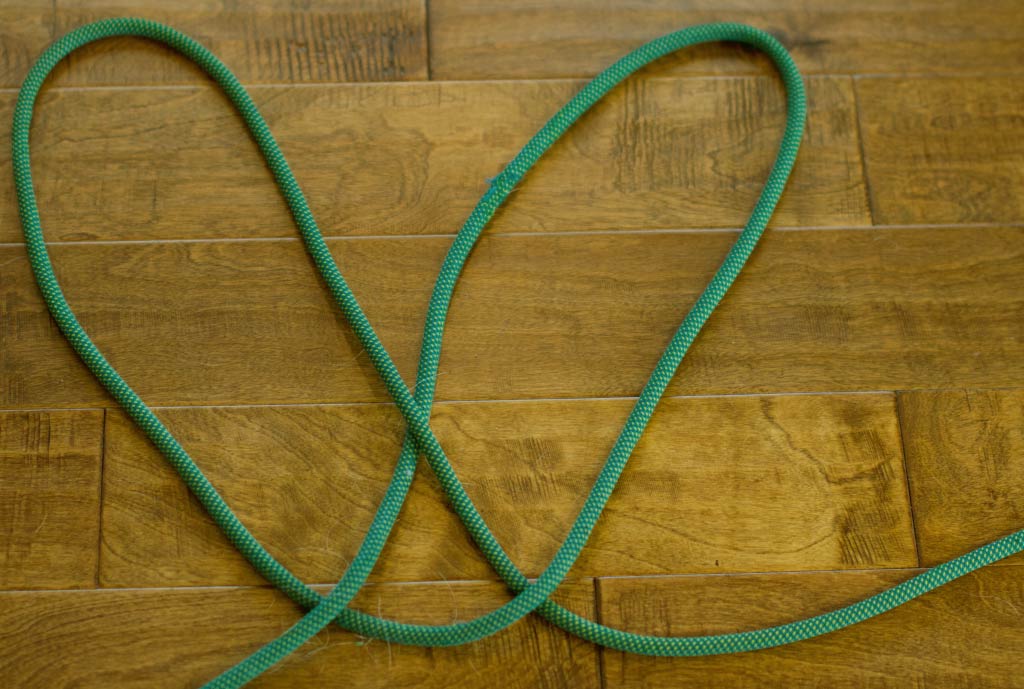
Loosen the knot you initially made until it resembles something similar to a large, pretzel-shaped figure. You should have about four to six inches of rope left at the base of this loosened knot.
Step 3:
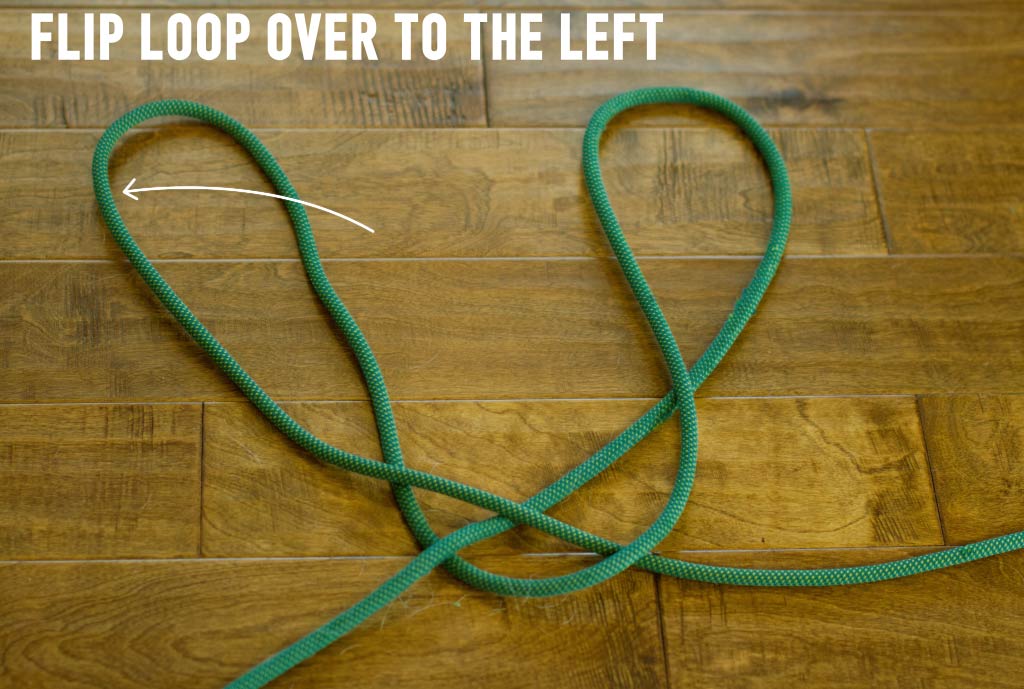
Take the outer part of the right loop and flip it to the left so that it is crossing over the inner part of the loop.

Step 4:
Take the inner part of the left loop and flip it to the left so that it is crossing over the outer part of the loop.
Step 5:
Pick up the left loop and lay it down so it crosses over the right loop.

Step 6:
Take the other end of your rope (the long end) and weave it through the top-layered loop so that it is being pulled over the top layer of rope and under the bottom layer of rope. Pull the rope all the way through, but do not pull the knot tight.

Step 7:
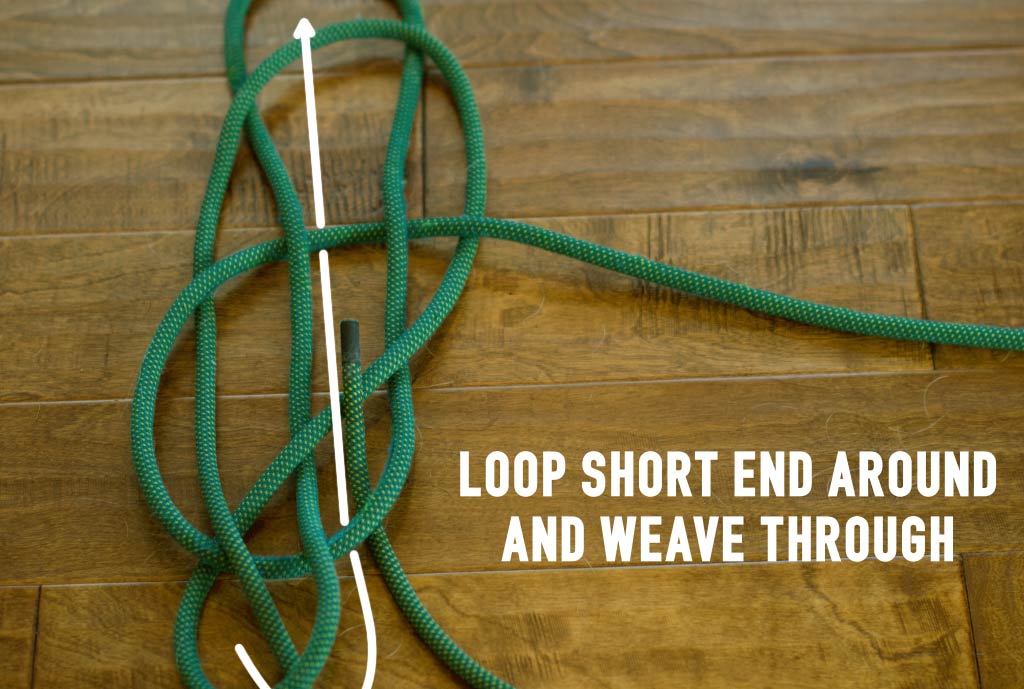
Grab the short end of your rope and weave it through the bottom-layered loop. It will start by going under the rope you pulled through in step six, then it will go over the top-layered loop, under the rope pulled through in step six, over the top-layered loop again, and under the bottom loop.
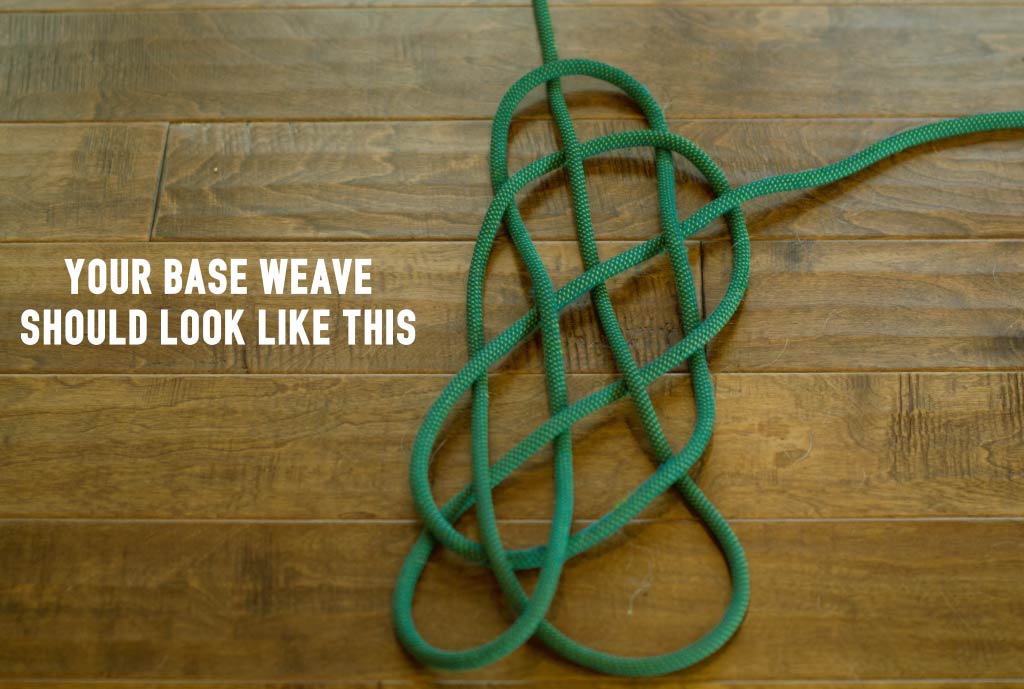
Step 8:
Look at your rope and make sure it looks like the picture below. This is the base weave of your climbing rope rug.
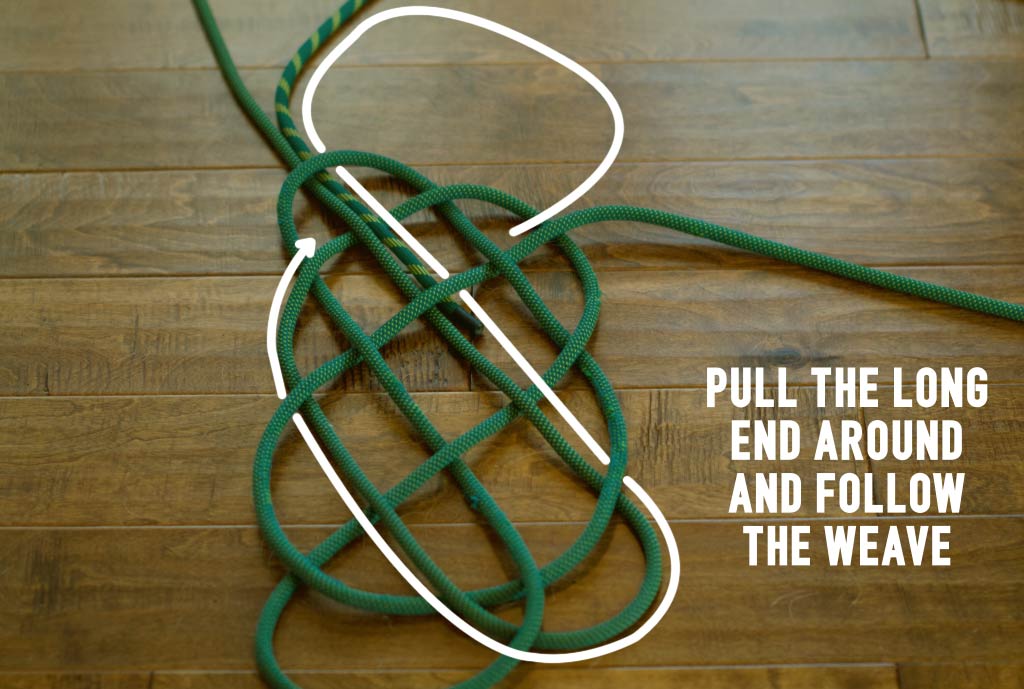
Step 9:
Take the long end of your rope and pull it through your base weave. Starting at the top left corner loop, weave the long end of your rope in an under-over fashion. The rope should go around the outside of the bottom right corner loop and follow the outside of this loop. Continue tracing the base weave until you get back to where you started.
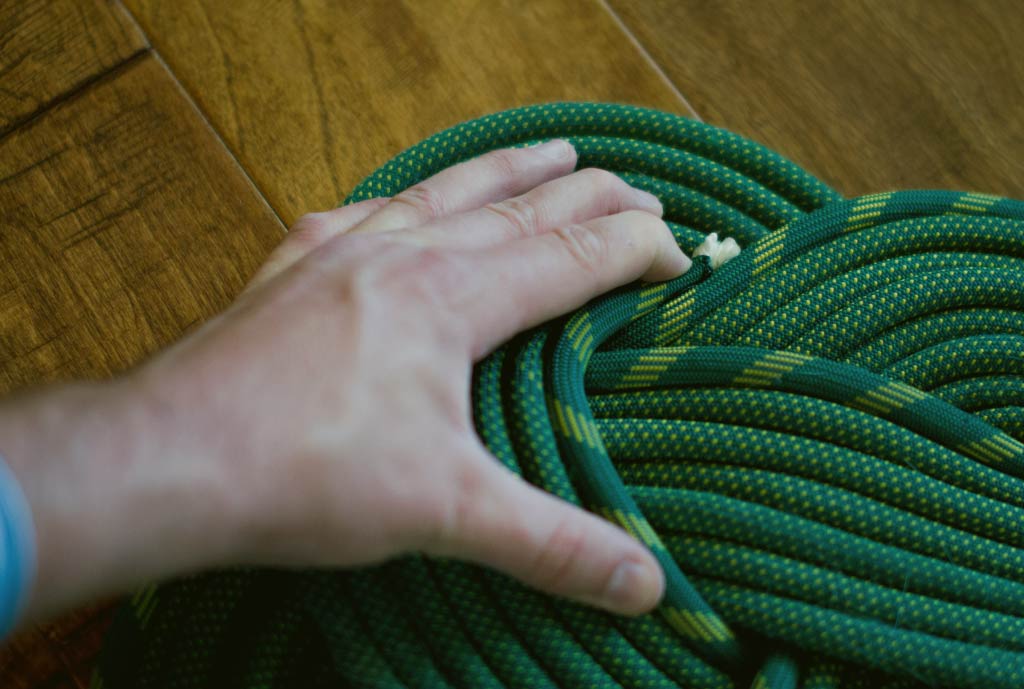
Step 10:
Following this pattern until you run out of rope or the rug is the size you want it to be. Once your rug is complete, cut any extra rope from the long end.

Step 11:
Flip the rug over. Heat each end of the rope with a lighter. The nylon will melt and essentially become a glue stick.

Step 12:
Once the end of the rope is heated, press it to an adjacent part of the rug while it cools. This will prevent your masterpiece from falling apart. Do this to both rope ends.
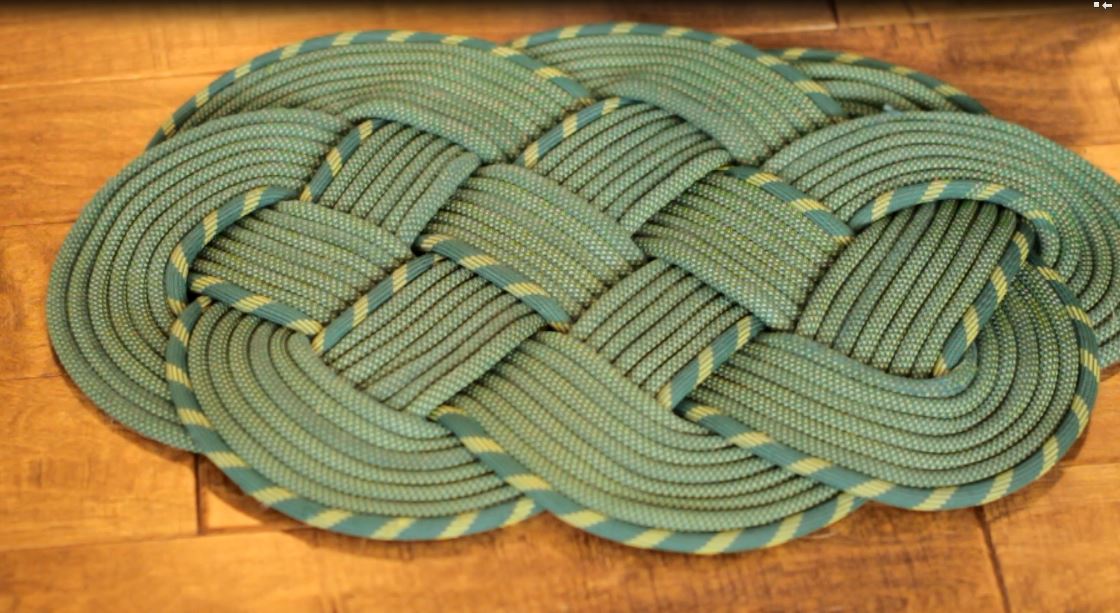
Voila!
Your rope rug is complete. Find a spot for it on the floor, on the wall or wherever you'd like to show it off.
To see how it's done, watch our video. In the video we use paracord to show you the process.